Quick Start
Get up and running with a new Motia project in just a few seconds.
Motia is a unified backend framework where everything is a Step — a file with a config and a handler. Python developers don't need npm; Node.js developers don't need Python. Choose your language or use both in a mixed project. In this guide you will create a new project with the motia-cli, start it with the iii engine, and trigger your first workflow.
Prerequisites
- Git installed
- Node.js 18+
- iii (install in Step 1)
1. Install iii
The iii engine is the runtime that powers Motia. Install it with:
Verify the installation:
3. Create Your Project
Run the create command and follow the prompts to choose your project name and language:
Select your preferred language when prompted:
- Node.js — TypeScript/Node.js only (no Python required)
- Python — Python only (no npm required)
- Mixed — Node.js handles HTTP APIs, Python handles background processing; both share the same iii infrastructure
4. Start the Project
The iii-config.yaml in the project tells the iii engine how to run Motia — starting iii starts everything.
6. What Just Happened?
When you created a ticket, here is what Motia did behind the scenes:
- HTTP trigger — The
POST /ticketsrequest hit a Step with anhttptrigger, which validated the input and stored the ticket in state. - Queue trigger — That Step enqueued a message to a topic. Another Step with a
queuetrigger picked it up and processed the ticket asynchronously (e.g., classification, notification). - State — The ticket data was persisted using Motia's built-in key-value state, so the
GET /ticketsendpoint could retrieve it.
All of this was defined in simple Step files inside the src/ folder. Each one uses the .step.ts pattern and exports a config (defining triggers and topics) and a handler (business logic).
7. Try the iii Console
iii is in alpha
Motia and iii are under very active development. We will be regularly updating Motia, iii, and the iii console to address any issues.
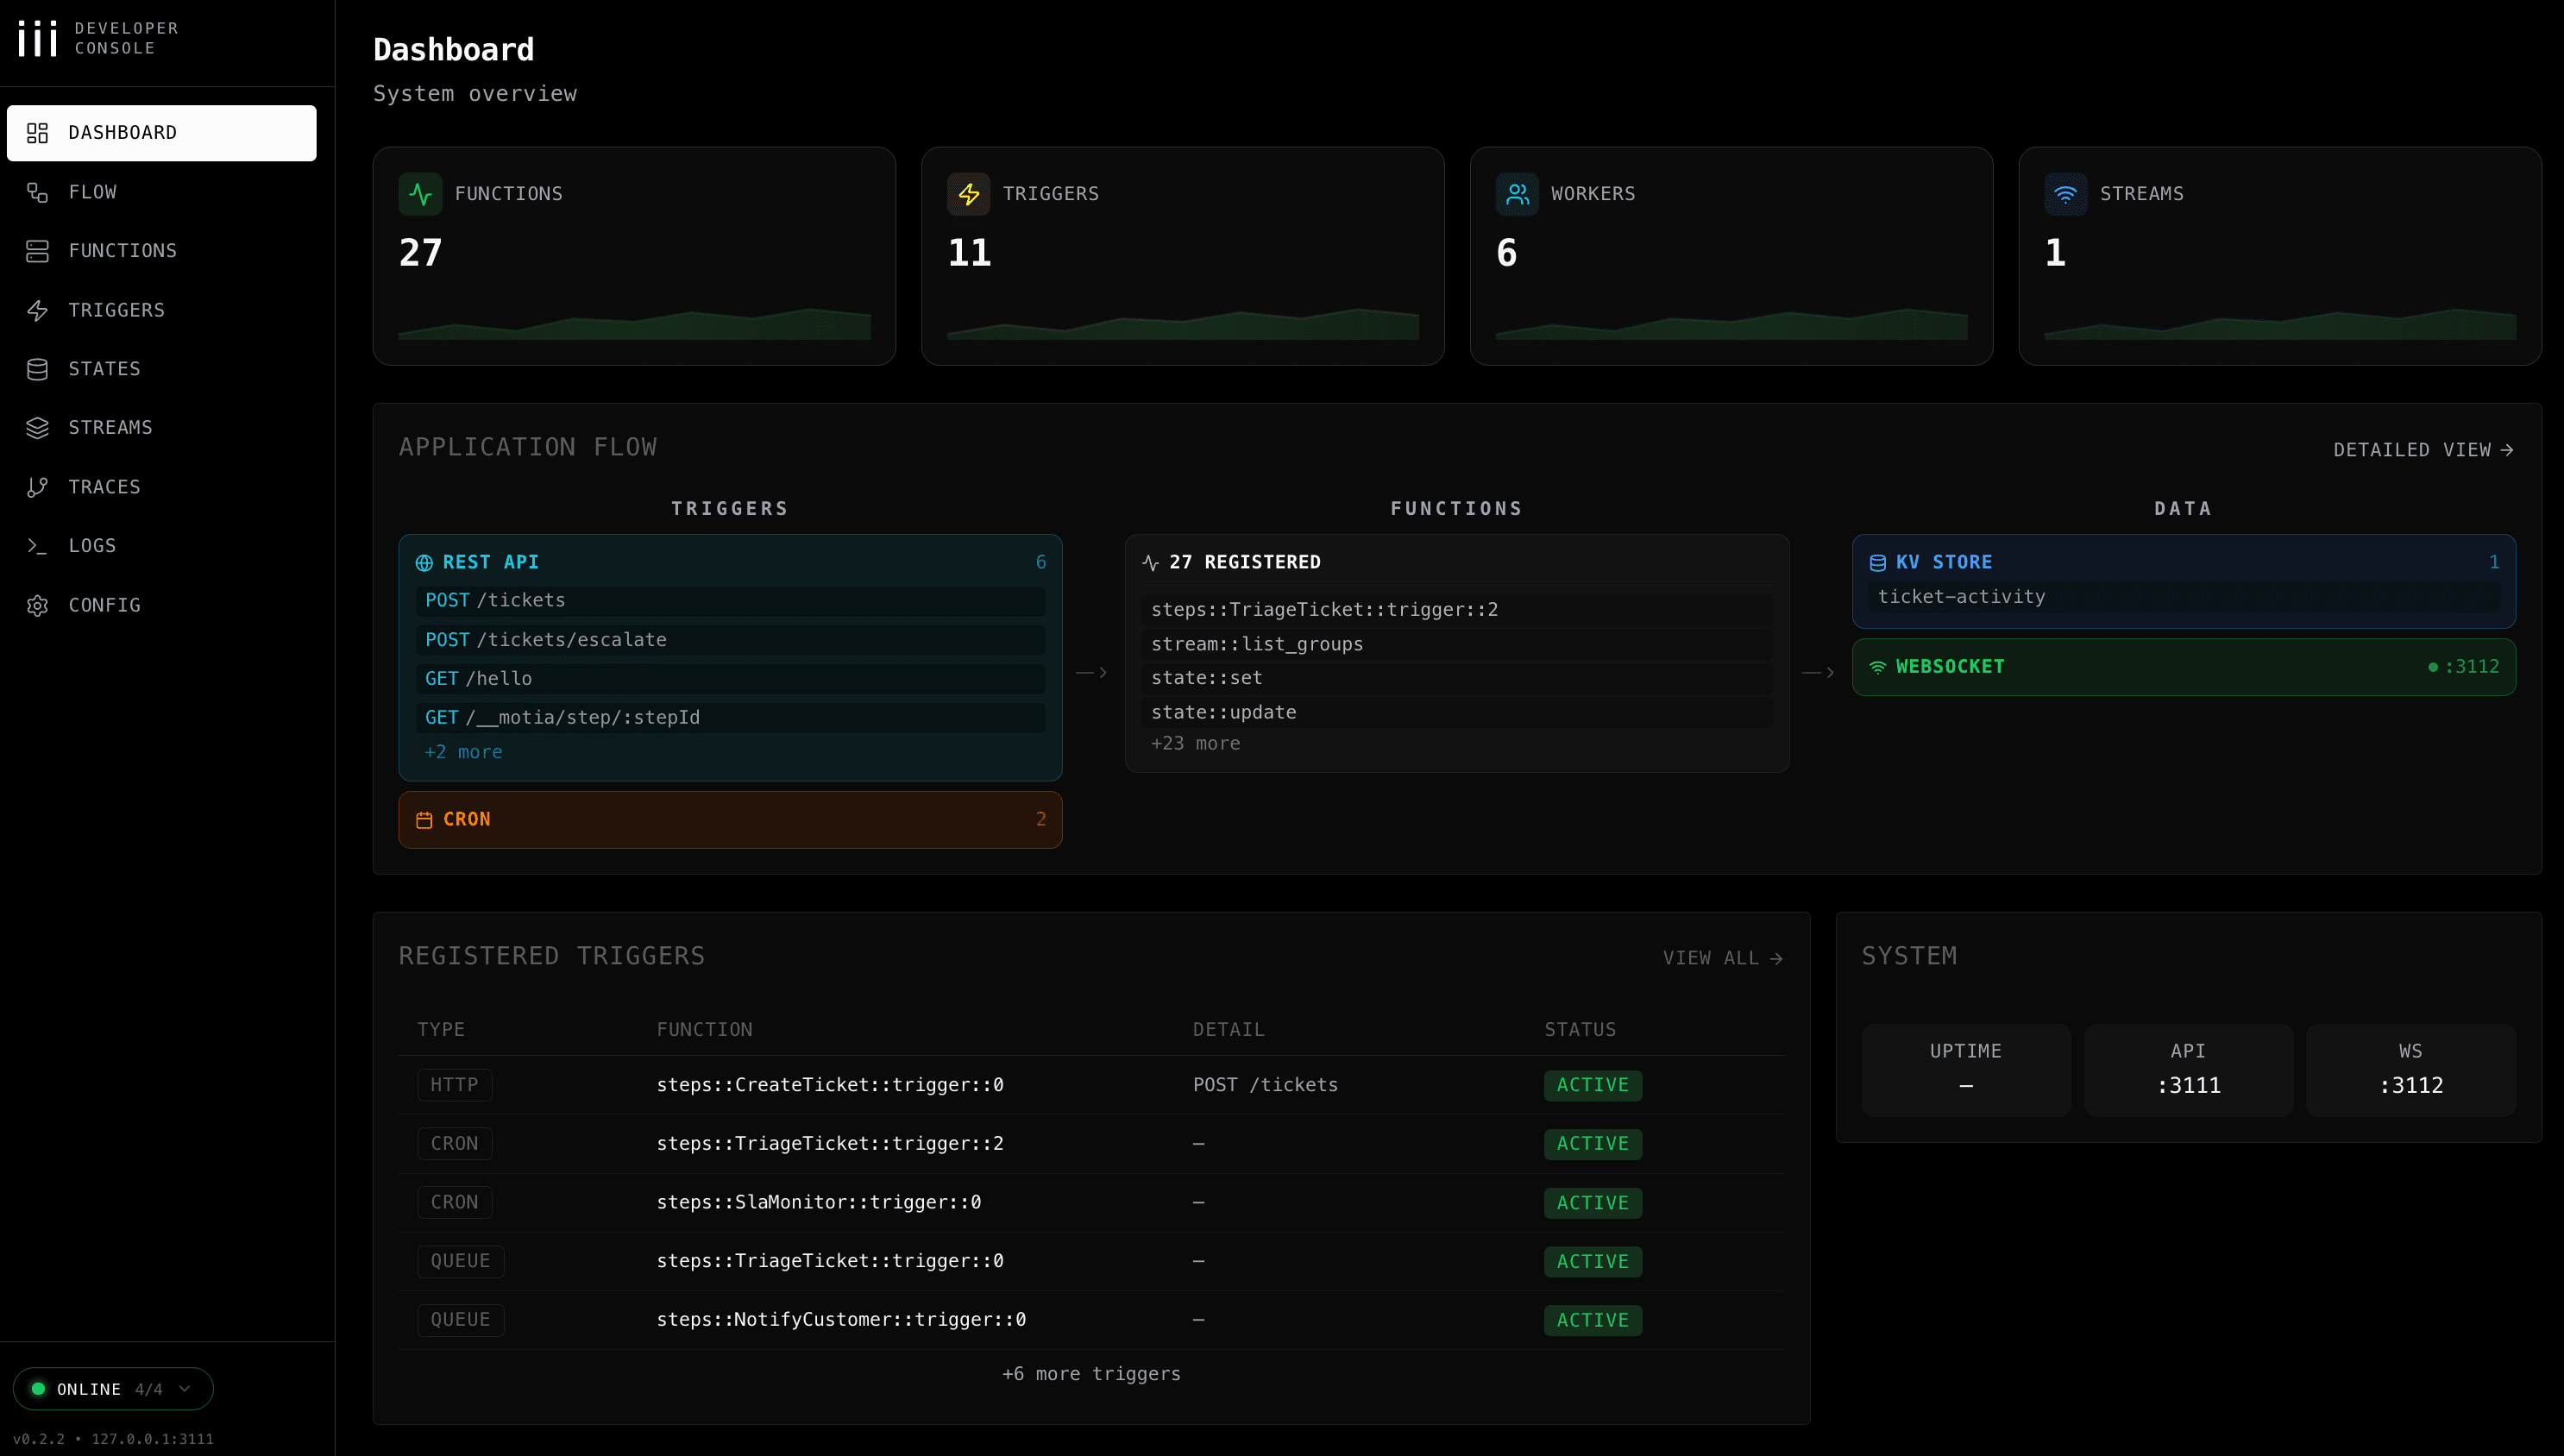
The iii console gives you complete observability of your Motia project — flow diagrams, real-time logs, state inspection, and stream monitoring. Install and start it in a new terminal:
Then open your browser to: http://localhost:3113/
The console dashboard gives you a system overview of your running application:
Navigate to the Flow tab to see your Steps connected as a visual workflow:

Manual Setup (Alternative)
If you prefer to clone the example repository directly instead of using motia-cli:
Next Steps
You have successfully run your first Motia workflow. Here is where to go next: